
Easy DIY Coconut Yoghurt With 2 Ingredients!
/
If you're generally dairy-free like me, there's probably one thing you miss quite a bit: YOGHURT! That tangy taste, all that natural probiotic-goodness for the gut, and a protein-rich part of breakfast (or even dessert). I remember when I first discovered coconut yoghurt - it was like hitting the jackpot. THIS STUFF EXISTS?! If you haven't already tried COYO coconut yoghurt, you don't know what you're missing. I first discovered COYO when I was living in Sydney, Australia about 4 years ago. Mind blown. When I started spending more time in London for work and naturopathy school after moving to Europe, I realised Whole Foods and Planet Organic stocked it, so I could still get my COYO fix. To my absolute delight, it's now also stocked in Amsterdam, at the Marqt chains, as well as the Vegabond deli/ store. They've got all kinds of flavours from natural to raw chocolate (with raw cacao powder), to mango, and pineapple... and I've lost count of all the other funky new flavours they've got now. The London stockists are now even doing COYO coconut ice creams.
The label on the raw chocolate flavour looks like this:
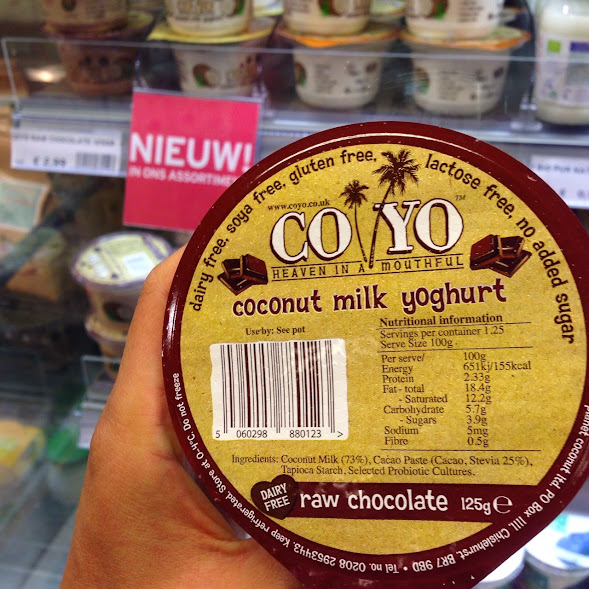
The ingredients label says "Coconut Milk (73%), Cacao Paste (Cacao, Stevia 25%), Tapioca Starch, Selected Probiotic Cultures." It's also "dairy-free, soya-free, gluten-free, lactose-free, no added sugar". OK... not too bad, not so processed and let's not get into a discussion about stevia processing methods here. (it's the lesser of 2 sweet evils). ;p
ANYWAYS... I dunno about you, but I could eat all the coconut yoghurt EVERYDAY. The only problem is, I don't have the budget to fund this appetite. At almost €5 for a 250gm pot of yoghurt (and I could easily polish off 250gm in one go even though I shouldn't!) - I'd be emptying my pockets real quick at the rate I inhale this stuff.
So I've been experimenting with making my own coconut yoghurt, since I like the process of fermenting your own food (yes people, yoghurt is a fermented food). After some failed attempts and some tinkering around with various recipes, I've found you only really need 2 ingredients (and time) to make a good, unprocessed coconut yoghurt:
1. You need a good quality coconut milk to begin with.
- Forget about using any coconut milk that contains guar gum/ xanthan gum (usually with E numbers on the ingredients list). These will separate or curdle into chunks later and don't look appetising even if you've picked up the nerve to try it.
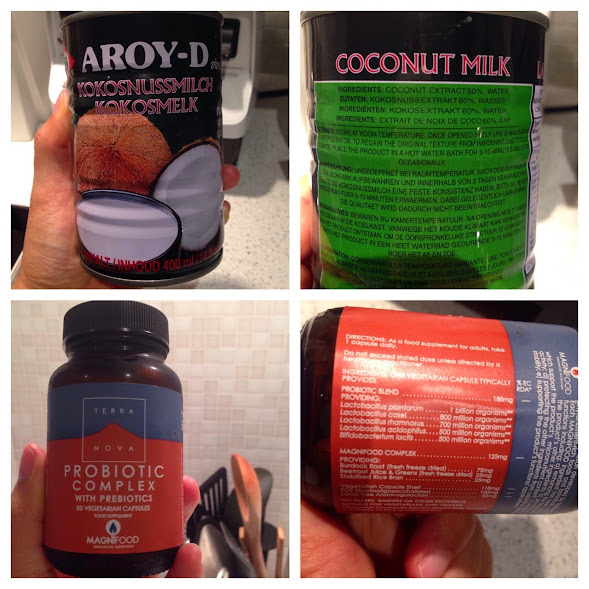
- Use a coconut milk that's just pure coconut extract and water, with nothing else on the ingredients list. In Amsterdam, the one I've found that works is the Thai brand Aroy-D (any Asian grocer on the Zeedijk/ in Chinatown will stock it). There's also the Indonesian brand Ayam that's just coconut extract and water, but they don't stock that here. READ THE INGREDIENTS LABEL of your coco milk - if there's no preservative/ flavouring/ colouring, it's more likely to ferment a lot better. It makes sense - the good bacteria recognizes and breaks down the natural ingredients, not the processed bulls**t. DUH.
- Side note: I've been trying to find out more about what exactly is in Aroy-D's coconut milk, since they have 3 kinds of coconut milk - one regular, one "for cooking", one "for desserts", but all have exactly the same ingredients on their ingredients lists... "Coconut Extract (60%), Water". So something feels fishy. Most online opinions (if that counts for anything) seem positive towards the brand, and it tastes close to the real, fresh coconut milk you get in Asia. More importantly, this is the brand I've found with best yoghurt curdling and taste results, so I'll stick with it. I've tried it with all 3 kinds of milks with similar results, so it doesn't really matter which version you use.
2. You need a good quality probiotic powder.
- The probiotic powder you use should be one that either needs to be kept in the fridge, or is activated when warm/ wet. This preserves the life of the millions of good bacteria, which basically are your "starter culture" to kickstart the fermentation process.
- The probiotic I use also contains a prebiotic, which helps to feed and stimulate the growth of the probiotic bacteria. I tend to try out different supplements, and this time I've got Terranova's in the fridge and it seemed to do the trick. I'm familiar only with the UK supplements as that's where I'm doing my nutritional therapy training - brands like Biocare, Nutri, Bio Nutri, or Higher Nature will be of a high quality.
3. You don't need a thickening agent, if you have time and patience.
- There are lots of recipes that will tell you to use variations of thickeners from arrowroot powder to organic corn starch or tapioca starch. You don't really need these.
- What I've found is: if you need your coconut yoghurt ready in 1-2 days, you can use these thickeners. Or you could just add 1 or 2 more probiotic capsules - that gives you a thicker yoghurt. Or if you wait a week or two, your coconut yoghurt will naturally thicken up on its own - give the bacteria time to do their thing. Just wait it out - it's also more fun and part of what I enjoy about fermentation - "When's it gonna be ready? What does it look and taste like today?"
So if you're ready, this is the method I find that works for me.
DIY COCONUT YOGHURT:
Ingredients:
- 1 Can of Good Quality Coconut Milk (check ingredients label, as above)
- 2x Good Quality Probiotic Powder Capsules (or you can use 1 capsule or 3, dependent on the strength of your powder. Using more capsules results in a thicker yoghurt more quickly - experiment with yours and see.)
- *If you prefer a sweetened yoghurt, you can add your preferred sweetener. Just don't use raw honey as the bacteria in this can work against the probiotic powder bacteria.
Tools:
- 1x Mason Jar, distilled (soaked in boiling water and cooled down before use).
- 1x Wooden Spoon
- 1x Tea Towel
- 1x Rubber Band
Method:
- Empty contents of probiotic capsules into the coconut milk. This particular powder is pink and gives the final mixture a pastel pink look.
- Use a wooden spoon (not a metal spoon) to stir the powder evenly into the coconut milk. Sometimes when I'm too lazy to even do that, I just screw on the lid and give the jar a good shake. (I haven't found satisfactory scientific evidence for why you shouldn't use metal containers or utensils when fermenting, but most books tell you not to, and it's something about the bacterial action producing acid and leaching metals, but it's all very fuzzy with no one having real proof of this. I've adopted this approach anyway, even if it's folklore. Fermentation is from the old world afterall, so I'll follow whatever "they" say.) :)
- Put the tea towel over the open jar (remove the lid if you screwed it on to shake it), and secure with a rubber band. This allows the mixture to "breathe".
- Place this jar with its tea towel turban by a warm place for the next 24 hours- by a sunny window, above a radiator, next to the kettle... I usually multi-task and have the dehydrator working, and place the jar above it. The temperature's usually not higher than 42 degrees Celsius. In this shot, I'm dehydrating apples while keeping the fermenting yoghurt warm:
- After 24 hours, remove the tea towel turban, secure the lid on and place it in the fridge for another 1-2 days. It can be enjoyed from a day or two after the first 24hrs of fermenting, but depending on how runny you like your yoghurt, you can wait up till 7 days for it to get thicker. The longer it goes, the more tangy/ sour it gets too. Keeps in the fridge up to two weeks, if it lasts that long!

This Greek yoghurt kind of thickness was achieved by using 3 probiotic capsules and waiting about 3 days:
If you want a less chunky, but still thick (not runny) texture like this - this was achieved with 2 probiotic capsules within about a week:
You can also go to town with adding your own flavours too. Add flavours only after your first 24hr ferment (up to step 5 above). Since I looooooooove the raw chocolate flavour COYO, I got a similar result with this recipe:
- After the first 24hr ferment, up to step 5 above, add 6 tablespoons raw cacao powder and 1 tablespoon maple syrup (sweeten to your taste, as I don't like mine too sweet) to the fermenting yoghurt.
- Blend it all up in a high-speed blender.
- Screw lid on and place in the fridge for another 1-2 days. Keeps up to approximately 2 weeks.
This was the raw cacao coconut yoghurt a day or two later, so it's still looking quite runny (and bubbly):
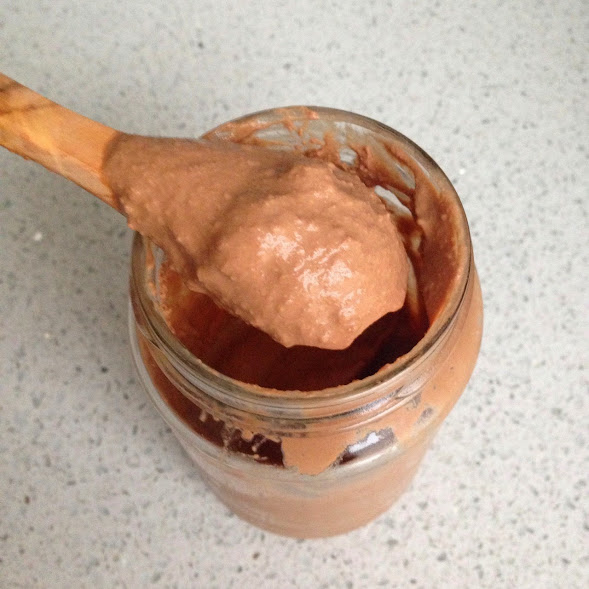
Tastes loads better than it looked at that stage, and can certainly give COYO's raw cacao version a run for its money, if I say so myself. ;p
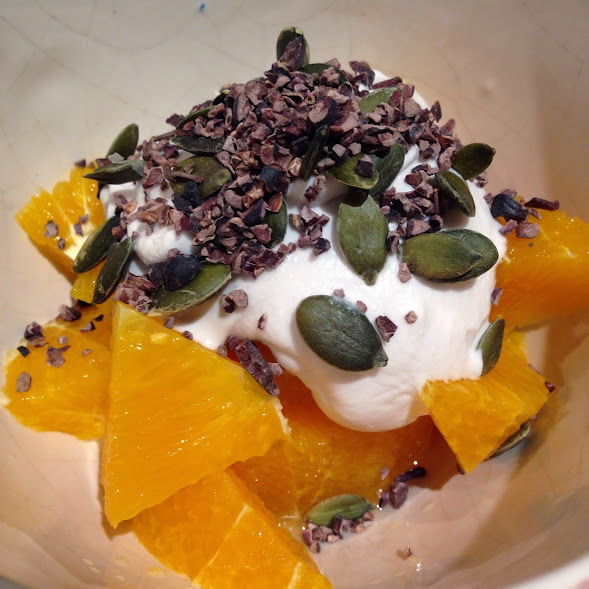
As you can see - I've been having fun experimenting with this, to see what results I get with varying the amount of probiotic powder or flavours. It's also super satisfying eating yoghurt you've made "from scratch" yourself. I have a few of these at varying stages of fermentation in my fridge (put labels and write the dates of when you started each ferment on each jar!) and it's handy to add a spoonful or two to smoothies or in raw, soaked porridge, like in the picture below.

Have fun experimenting with this one, and I'd love to hear how your yoghurt turned out!
Leave comments or questions in the section below, or even suggestions for other flavour ideas.
Good luck!


