
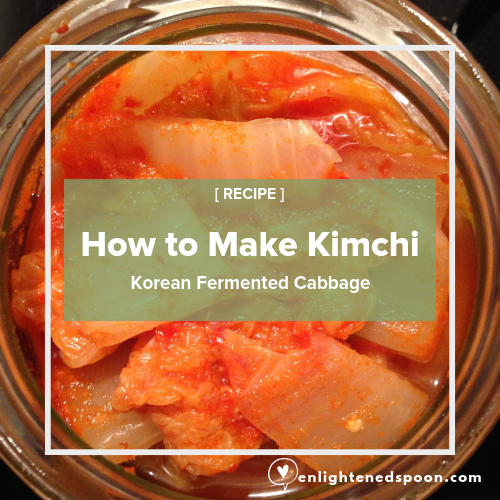
[RECIPE]: How to Make Kimchi
/If you’re a fan of Asian food, you might be familiar with the Korean side dish called Kimchi. It’s a fermented, spicy cabbage dish, but there are all kinds of other variations of it made from daikon (turnip), carrots to cucumbers.
As an amateur fermenter, kimchi’s one of the staples in my kitchen and it’s one of the easiest foods to make, and also something I recommend to my clients if they’re looking for more ways to increase their probiotic foods.
What Is A Probiotic?
A probiotic is something that contains the good bacteria that inhabits your gut. It’s one of the reasons why many people take a probiotic supplement in capsule form. The other way of increasing the good bacteria in your gut is to eat probiotic foods - the time it takes to ferment the foods helps to grow the colonies of bacteria that can support good gut health after eating them.
Examples of other probiotic foods:
Yogurt (fermented milk)
Sauerkraut (fermented cabbage)
Kombucha (fermented black or green tea)
Kefir (fermented milk or flavoured water, dependent on the grains used)
Miso (fermented soybean paste)
Tempeh (fermented tofu)
Benefits of Kimchi
Why all this talk of probiotics and good gut health, and why is kimchi great for it?
Immune booster. 70% of your immune cells lie in your gut as GALT (gut-associated lymphoid tissue), so a happy gut helps to lay the foundation for a happy, healthy you.
Improve gut flora balance. By having a higher level of good bacteria, it helps to crowd out/ reduce the level of bad guys - the yeasts and other mycotoxic bacteria that produce the gases and toxins that make you bloat, inflame your gut wall linings leading to ‘leaky gut’/ intestinal permeability, which could then lead to food intolerances.
Prebiotic and probiotic. The great thing about kimchi is that it’s not only a probiotic that contains colonies of good bacteria, the Chinese cabbage used in kimchi is also a prebiotic - Prebiotics contain the nutrients that feed and nurture the good bacteria once it’s in your gut. So you’re getting a 2-in-1 gut health booster.
Kimchi Recipe
Here’s the basic kimchi recipe I love - loosely adapted from Sandor Katz’s “Wild Fermentation” book. Sandor Katz is one of the old-school gurus of fermentation - who had a crazy moustache and personality to go along with it before the hipsters even knew what “hipster” meant.
All of his fermentation books are always referenced and highly revered by some of my food idols like Michael Pollan, so if you’re interested in more fermentation techniques (eg. making cider/ vinegar/ pickles), definitely look up his books.


INGREDIENTS:
1 head of or 500 grams Chinese cabbage (napa or bokchoy if you can’t find Chinese cabbage)
5 cloves garlic, chopped (or more!)
5 - 8 red chillies, de-seeded (or more! Any form of hot peppers - fresh, dried, or in a sauce with no preservatives)
1 Tbsp Asian Chilli powder (optional - if you like a good kick)
3 Tbsp fresh ginger - peeled and roughly chopped (or more!)
1.5L water
5 Tbsp sea salt
Optional:
1 daikon radish or a few red radishes sliced thinly
1 - 2 carrots, sliced on a diagonal, ½cm thick
1 - 2 onions and/ or leeks and/ or a few scallions and/ or shallots and/ or sliced turnip
METHOD:
Combine water and salt and mix until the salt dissolves. Add more salt if needed - it should taste really salty as you’re making a brine here.
Coarsely chop the cabbage, slice the radish, turnip or carrot and add to the brine solution.
Place a plate or large plastic lid on top of the veggies and a weight on top, like a jar filled with water.
Allow this to soak for 8 hours or overnight. Remove the veggies by scooping them out of the brine mixture. Reserve the brine for later use.
Puree the chili, chili powder (if you are using it) ginger and garlic in a food processor or high speed blender, add brine as needed to blend and make a thick paste.
Put on a pair of washing up or latex gloves so you don’t burn your hands and mix this paste into your vegetables well, being sure to coat each piece. (I actually have a pair of “kimchi gloves”, only for making kimchi!)
Finally, pack the kimchi into your prepared jar(s). Make sure to leave a 5 - 10cm gap at the top of the jar for the kimchi to expand.
Leave at room temperature for about a 4 – 8 days, checking after 4 days for required ‘sourness’. When the desired flavour is reached, transfer the jars to the fridge. This will keep for months if kept refrigerated.
I still have kimchi from this batch made in September last year sitting in the fridge and it’s still (surprisingly) good! Traditionally, they used to be buried in the ground and kept for years underground… so… it’s all good. If you see any tell-tale signs of blue/ white/ green mould, or if it tastes “off”, then definitely bin it. There’s a “good” kind of off and a “definitely not good” kind of off. Fermenting your own foods starts to hone your tastebuds. Enjoy the process!

You might also find these other articles helpful:


